Sunday, September 21, 2008

Drift Fishing Rig Set up for the River

This is my favorite way to fish when on the river to target fish, whether the fish are on the move or if they are holding in a certain area to get some much needed energy for their journey. Drift fishing to me is fun because I don't get bored and I'am always moving around, this is especially good for me when it gets cold outside and I tend to stay warm when drift fishing.

I like to use a variety of attractants when drift fishing; whether it be yarn (which comes in many different colors and sometimes with some scent attractant), lures, salmon egg clusters, or sand shrimp. I also like to change the color of yarn often if one color isn't working maybe a different color will work, and there's nothing that says you have to use only one color at a time and sometimes I use two or three colors at a time just to give a little different presentation to the fish.


What you will need to set up a drift fishing rig is: a 1/0 hook (I like Owner Hooks, they have a nasty little barb and point on them), 15-25 pound leader line, 2 swivels, pencil lead (which you can melt yourself from old wheel weights or you can purchase a small coil of it from the local fishing store), surgical tubing(small enough in diameter to hold the pencil lead tightly), and finally a corkie of your choice of color(I find that kings like red, peach, green, black, purple, and pink).


You must tie an egg loop on the hook if you intend to use any kind of yarn or bait when drift fishing, after the egg loop has been tied you can choose the color of corkie you plan to use and slide it down the leader line to the eye of the hook.


The next step is to decide if you want your weight to be fixed or sliding; by using the sliding weight the fish will not sense the weight is there when the fish takes the bait, start by using more lead than what you think you may need because you can always cut your lead down but if you don't cut enough it won't be heavy enough to get your presentation down in the water to where the fish can see it. Cut the lead with needle nose pliers to the desired length and then cut a piece of surgical tubing big enough to hold the weight and still have a little bit left over to secure to the swivel.


The last step is to tie on a swivel on the main line and just above that slide another swivel and attach the pencil lead to that swivel for a sliding weight. Then choose to fish with either yarn or the bait of your choice and remember to cast 1/4 upriver and let the rig drift downriver, if the rig is getting hung up on the bottom, you have too much weight and need to cut some off, you should feel it hit the bottom and continue downriver "tick tick ticking along the bottom of the river" is perfect.


I also like to set up a few different rigs before I go fishing without the corkie and weight and just tie a few leaders and place them in my Pips Leader Keeper and this way I can always be ready to just pull a tied leader out and slide on the corkie, this is especially helpful when the bite is on and I have just lost my hook set up to a fish or if the rig gets stuck under rocks or any other object.

Tuesday, September 2, 2008

How to set up a plunking rig for the river

On this post I will include pictures on the steps on making a plunking rig; by definition a plunking rig in the river is used to place the bait on the bottom of the river with either salmon eggs, or prawns, or a combination of both to attract the migrating salmon to make the salmon mad and entice it to strike at the bait.

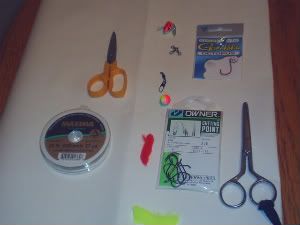
You will need the following items to make a plunking rig: I prefer to use a 1/0 hook by Owner, 15-25lb. test fishing line leader, a 3-way swivel, a spin-n-glow(these come in a variety of colors and sizes and each is used for certain times of day, water color, etc. and have wings to make them spin at a high rate of speed in the water and make a "humming" or "buzzing" sound to attract fish), a small red bead, and a 3-5 oz. pyramid weight (this size of weight depends upon how fast the current is and how deep the water is, and also a good pair of sharp scissors or fisherman's clippers, you will also need a good fishing reel (I like Abu Garcia) and a good fishing pole (I like Lamiglas fishing rods as well as G Loomis for salmon and steelhead fishing), and a small fishing bell for the end of your fishing pole.

Photobucket (supplies needed for plunking rig)

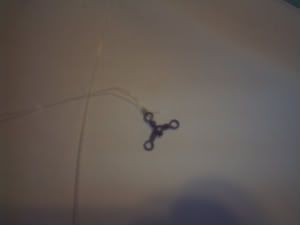
You begin by tying the main line from your fishing pole to the 3 way swivel; I like to use a simple fast knot when doing this, the clinch knot. After you have tied the swivel you cut a piece of leader to the desired length and tie your leader to the hook, for this knot you must use tie the egg loop in order for you to be able to fish with bait (salmon egg clusters or a prawn that has been brined and cured).

Photobucket (tying to 3 way swivel)

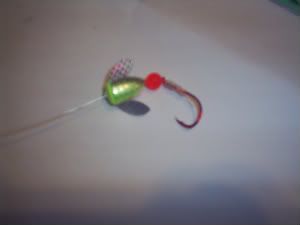
After you have tied the egg loop to your hook, you use a small red bead and slide it on the leader and then choose a color and size spin-n-glo and slide it on the leader ahead of the small red bead and then tie your leader line with the hook and spin-n-glo to one eye of the 3 way swivel. (see video for egg loop instructions)


Photobucket (what your rig should look like once your spin-n-glo and bead is placed)

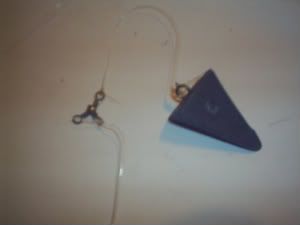
The last step is to tie a small length of leader line onto the third eye of the swivel and then tie the loose end to the pyramid weight. Don't forget to put your eggs in the egg loop and pull the leader line taught, but not too tight or else it will cut the bait in half. You are now ready to "plunk" for salmon or steelhead.

Photobucket (attaching the pyramid weight to the rig)

When you cast you line into the water you have to make sure you cast a bit upriver because the current will drag your set up a little ways down river about 3-6 feet before settling on the bottom,(if it does not settle on the bottom you need more weight) after it has settled to the bottom make sure to crank the reel a few times and feel with you fingers if the line has a "hum" to it and then clip on your fishing bell to the end of you pole and when a fish takes the bait, the bell will start to ring and then simply set the hook and hold on for an awesome fight with a spectacularly strong fish and be sure not to get too excited and "horse" the fish in because this will only break the line and you will loose the fish.

Monday, September 1, 2008

Upcoming blog entries

I have decided on a few new blog entries which I'am really looking forward to doing very soon; one of which is on how to tie a spin-n-glow (I have about 50 different colors of these and different sizes) rig set up and the other is how to tie a corkie rig(I have about 150 different sizes and colors); the spin-n-glow is typically used for what we call plunking (where we use a pyramid style weight large enough to let the rig set on the bottom of the river sometimes about 3-4 oz. with a cluster of eggs and let the fish find the bait) and the corkie rig set up is typically used for drift fishing where we use a small pencil lead that has been placed in surgical tubing to match the diameter of the pencil lead, casting upriver and letting the rig drift through a section of river attempting to make a salmon mad and hopefully therefore chase it and bites it, as salmon are teritorrial.

There are also many different colors of fishing yarn(I have about 20 different colors) that can be tied on the corkie rig; when yarn is used it gets caught in the teeth ot the fish and makes it harder for the fish to spit the hook and get loose.

I will include pictures on both rigs and each step taken to tie the two different rigs and also include some pictures with yarn and also eggs. I will also be showing how to fillet a fish, some more recipes, as well as some hunting tips when I start hunting this fall for deer. Keep checking back for both of the above posts and the pictures; these will be coming very soon. You may also subscribe to my blog and when I make these entries you will be notified. Until next time...Good day.